


Hosting a Static Website with AWS - S3, Route 53 & CloudFront
A comprehensive guide to setup a static website that is fast, reliable and safe.


I recently created my own portfolio website (Check it out here) and was so excited to deploy it out into the web! I quickly ran into a dilemma...where should I host my website? I had a few requirements:
- Load time - Needs to be lightning fast!
- Reliable - The server needs to be up 99% of the time.
- HTTPS - The service should provide an SSL certificate for HTTPS.
- Cost Efficient - I'm a recent graduate...and rent isn't cheap.
Sounds like a job for the largest cloud services provider: Amazon Web Services (AWS)
Why Amazon Web Services?
For starters, it is the leading cloud platform with about 33% of the market share, making it incredibly common in the development world. As someone who is starting their career as a software developer, it's likely that I'll have to work with AWS sometime.
Secondly, it checks of all the requirements above.
- Hosting with AWS S3 and distribution through the AWS CloudFront CDN provides an extremely fast response time for my website.
- Amazon SLAs guarantees 99.99% Uptime.
- Using AWS CloudFront and the Certificate Manager, I acquired my SSL certificate for the HTTPS protocol.
- With AWS Free Tier (12 months) it cost me $0.54 a month, since that is the price of my Route 53 hosted zone. Without the free tier, a single static site is estimated to be $3-8 per month.
Let's Get Started
Signing up for an account
Sign up for an AWS Free Tier Account HERE
This provides:
- 5 GB of data storage on Amazon S3 (12 months).
- 1 TB of Amazon CloudFront content delivery (Always free with the free tier).
- Free public SSL certificates through AWS Certificate Manager.
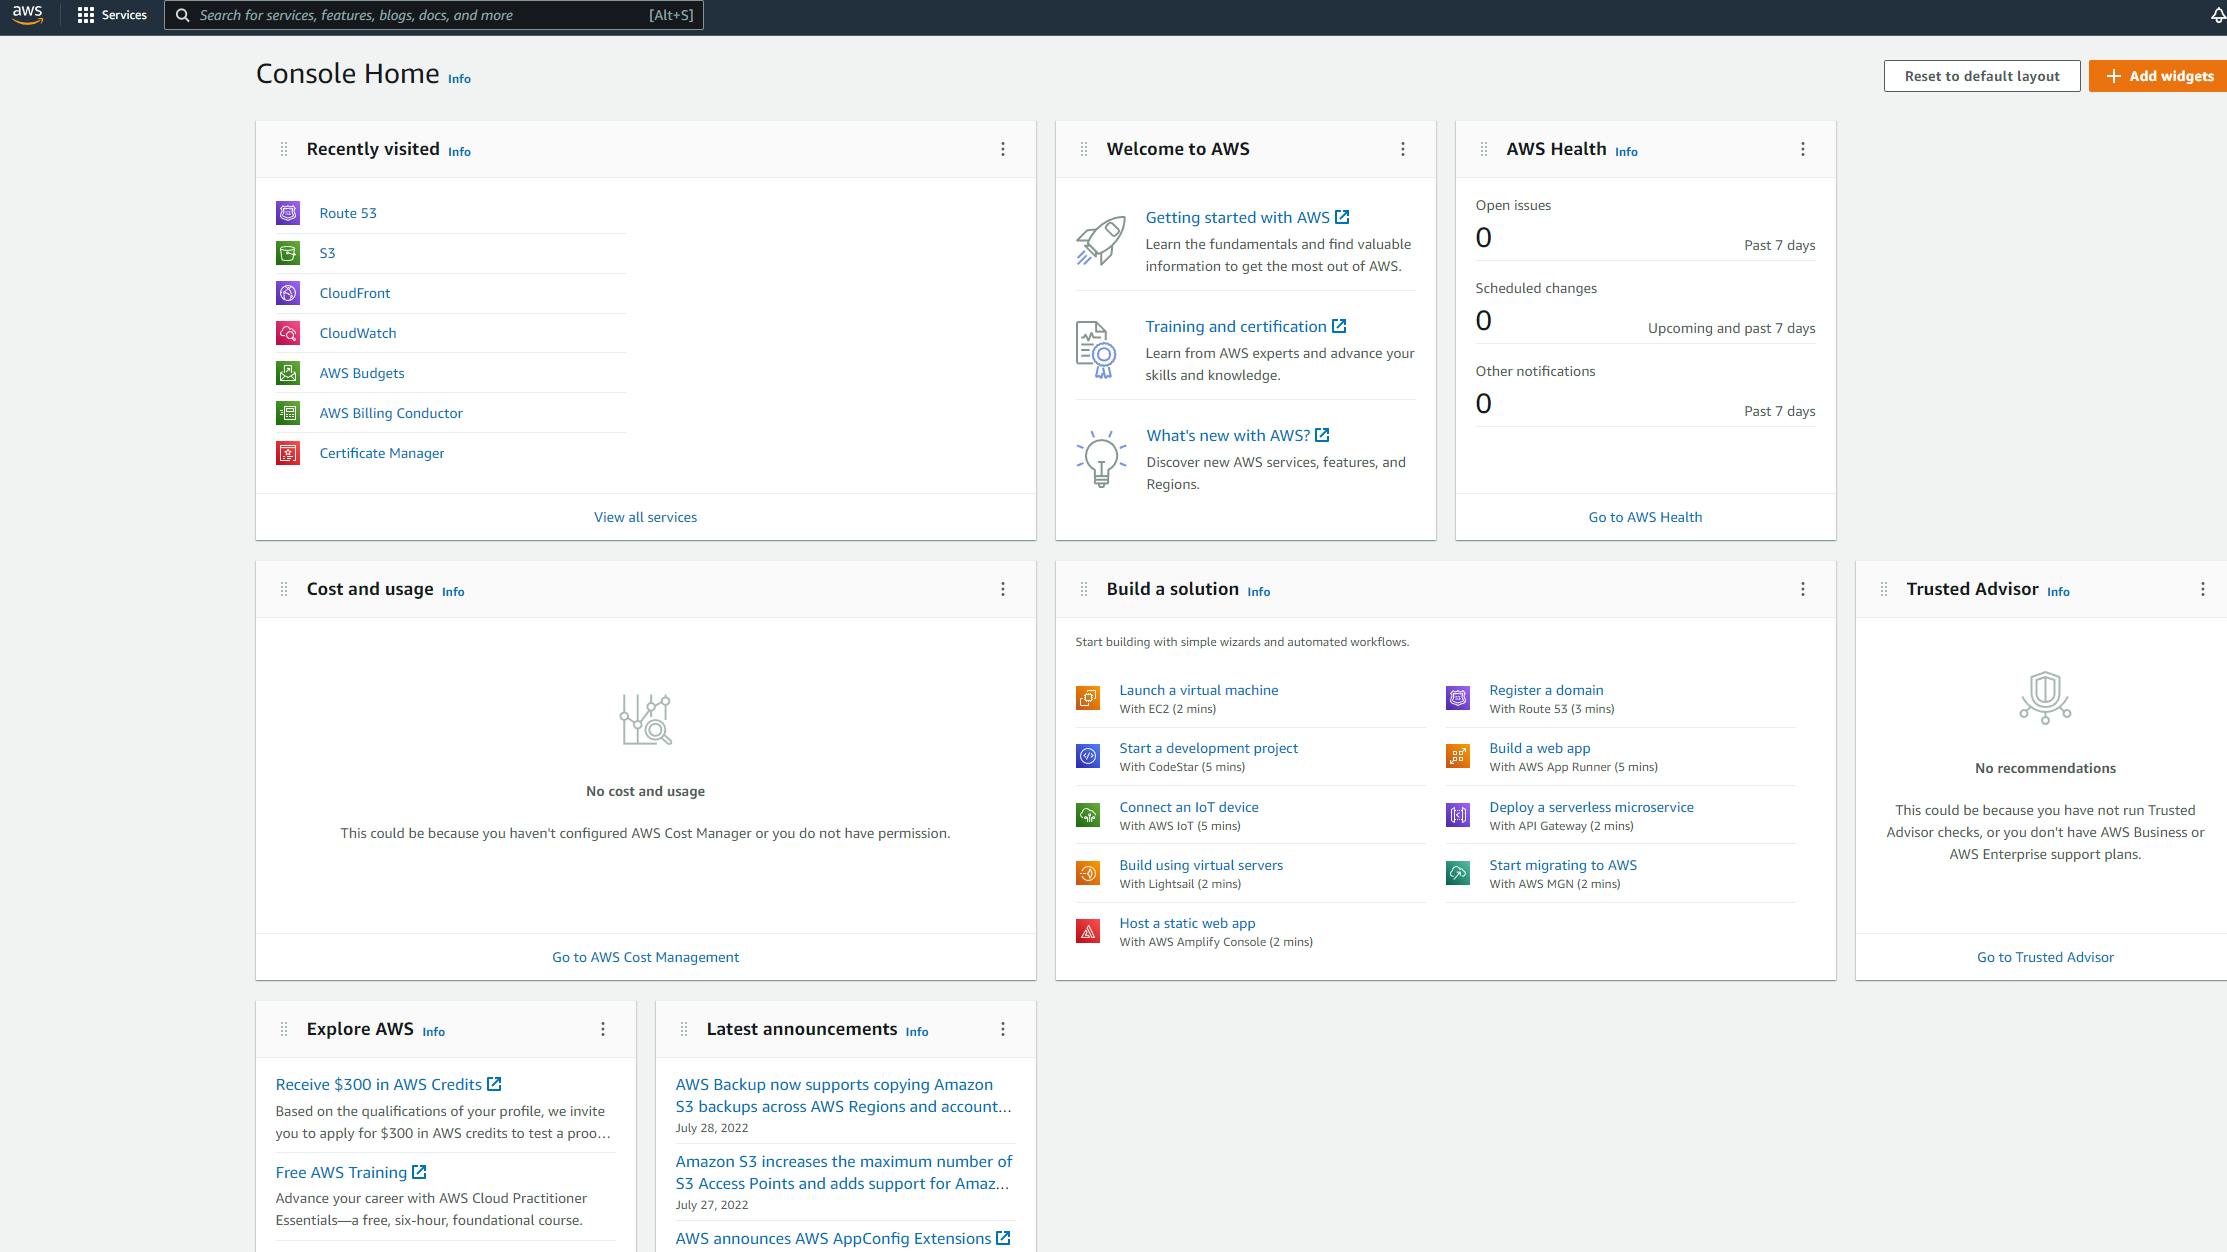
AWS Management Console
When you log into your AWS Management Console, this is what you'll see. A majority of navigation will occur in the search bar in the top right corner.
Amazon S3
Alright, let's get started! The first step is to create two S3 buckets. You may be wondering, why two?
- Bucket 1: Contains the "www" in your website URL and holds your website files.
- Bucket 2: Contains the website URL without "www". This bucket will be empty and acts as a redirect when users type your website's URL without "www".
According to MDN Web Docs, having your website consistent with one URL as the canonical location helps search engines and search engine crawlers find your site, which directly affects your SEO. Having a redirect will ensure that users will always land on the www version of your website.
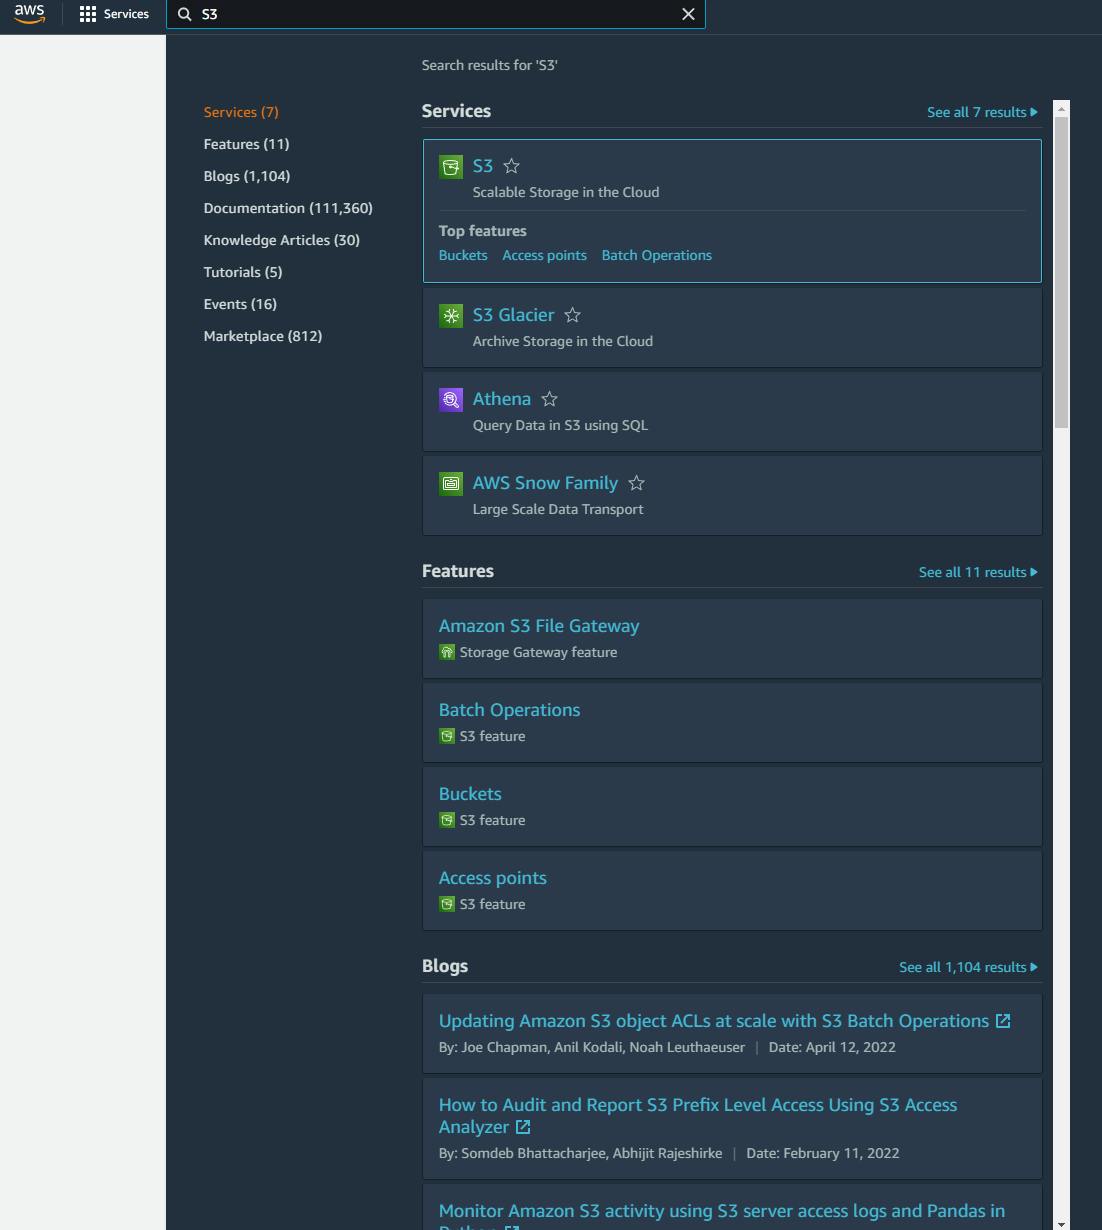
In the search bar, type "S3" and click it.
Creating S3 Buckets
First Bucket
- Click on the "Create Bucket" Button.
- For "Bucket name" type in your "www" version of your domain.
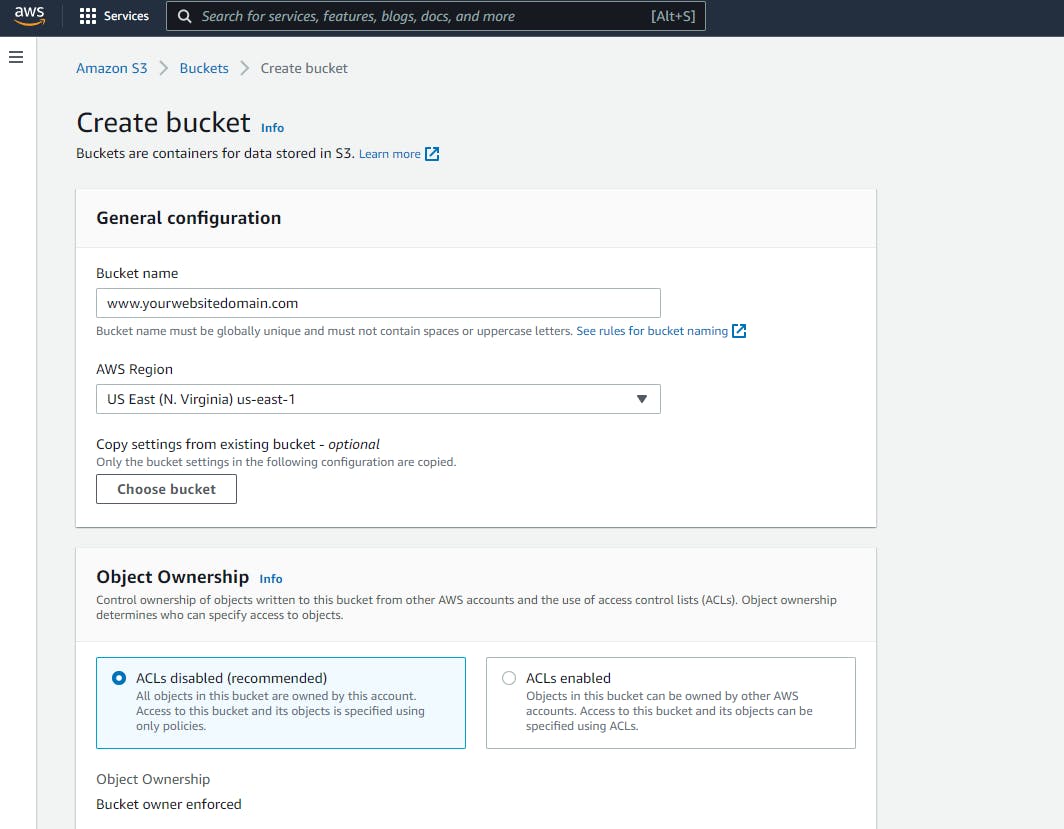
- Select "US East (N. Virginia) us-east-1" for the AWS Region. CloudFront only supports US East (N. Virginia) us-east-1 certificates.
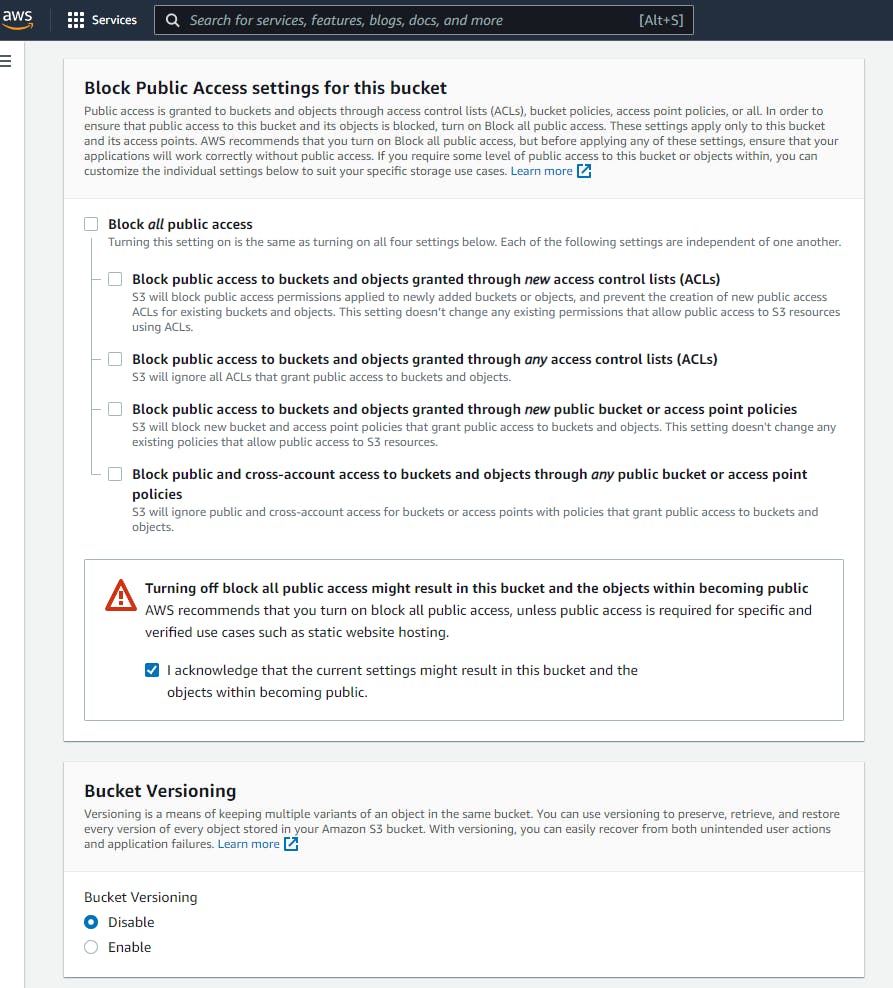
- Turn off "block all public access". This is required for static website hosting.
- Scroll all the way down and click "Create Bucket" to save it.
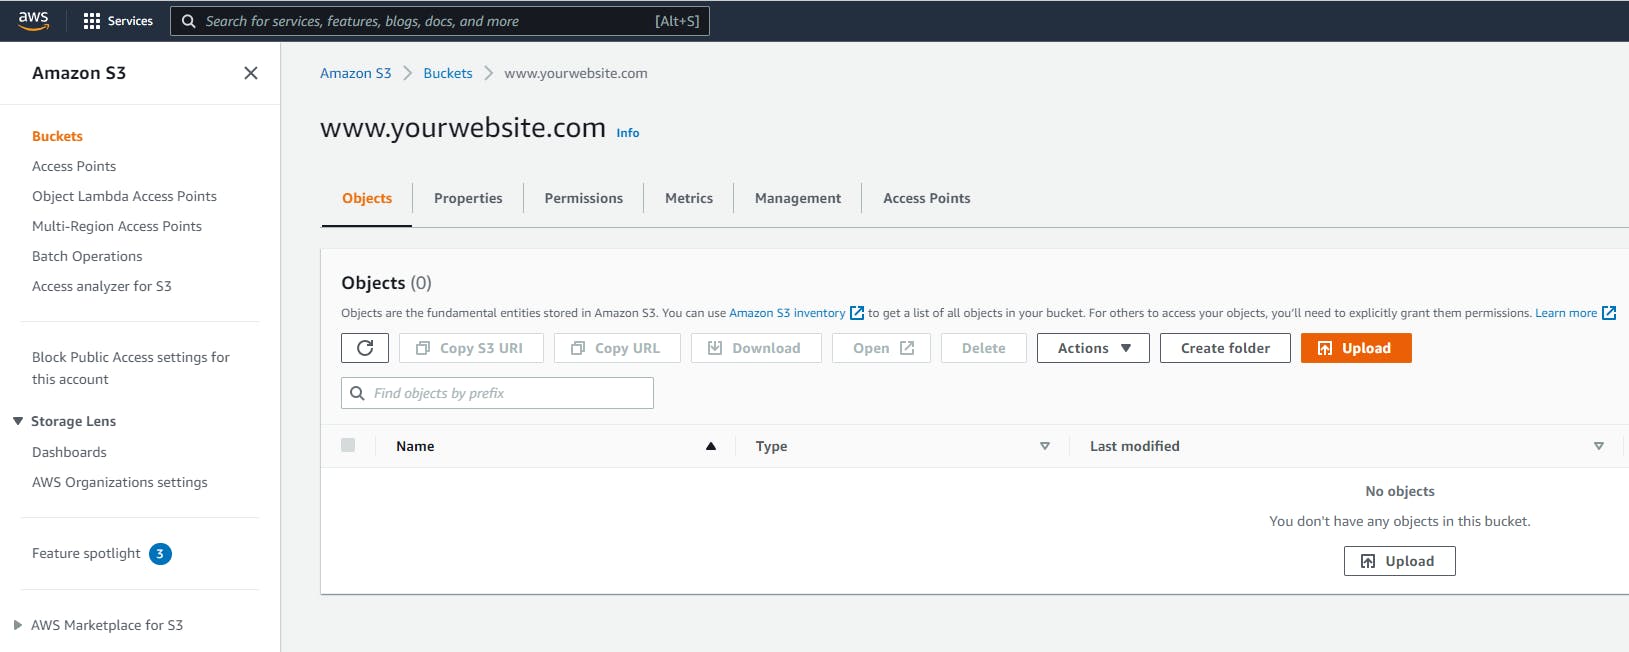
- On the main "Buckets" screen, you should see your newly created bucket. Click the "Upload" button and upload your website's files.
- Click on the "Properties" tab and scroll all the way down to "Static website hosting". Click the "Edit" button.

- Enable website hosting and make sure "Host a static website" is selected.
- For "index document", enter the file name of your entry point to your website like "index.html" if that is your starting point.
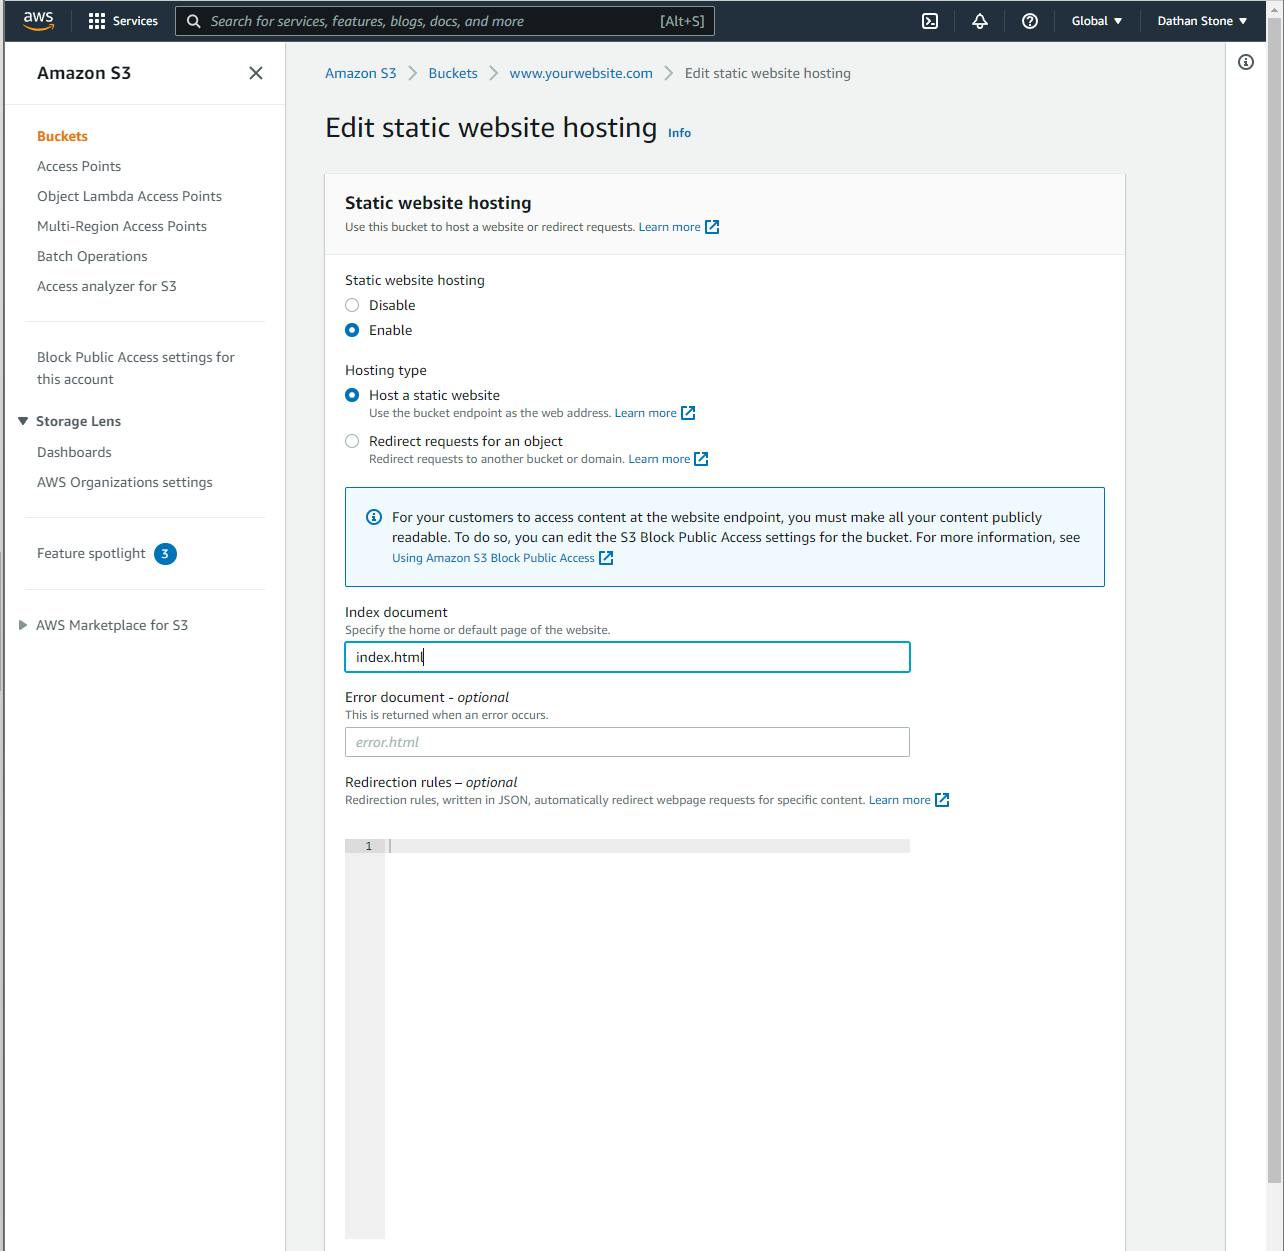
- Click "Save changes" at the bottom of the screen.
- Click on the "Permissions" tab and go to Bucket Policy and place this JSON policy inside:
{ "Version": "2012-10-17", "Statement": [ { "Sid": "PublicReadGetObject", "Effect": "Allow", "Principal": "*", "Action": "s3:GetObject", "Resource": "arn:aws:s3:::[www.yourwebsite.com]/*" } ] } - Important: Replace the domain in the brackets with your domain (Which should be the name of your bucket!). DO NOT KEEP THE BRACKETS. This is a policy that allows anonymous users around the world to read the "Objects" in your S3 bucket, meaning anyone can access your static website.
Second Bucket
- Click on the "Create Bucket" Button.
- For "Bucket name" type in your non-www version of your domain.
- Select "US East (N. Virginia) us-east-1" for the AWS Region.
- Scroll all the way down and click "Create Bucket" to save it.
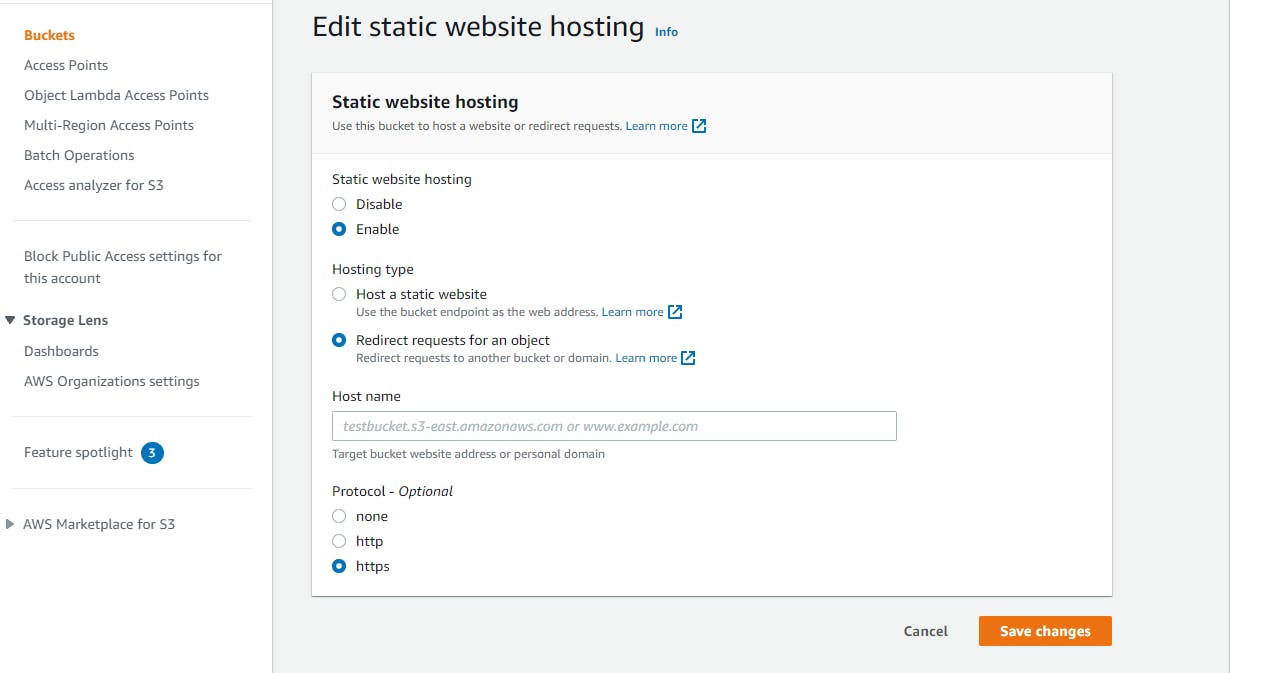
- Click on the "Properties" tab and scroll all the way down to "Static website hosting". Click the "Edit" button.
- Enable website hosting.
- Select "Redirect requests for an object" for Hosting type.
- Enter your www version of your domain (should be the name of bucket 1) into the "Host name" section.
- Select protocol as "https" and save changes.
Finishing Up
Congrats on setting up your first buckets! If you go into the "Properties" tab in both buckets and scroll all the way down, you should be able to click your "Bucket website endpoint" and see your website in action.
Route 53
Route 53 is Amazon's Domain Name System service meaning it connects requests from users to websites. You can also configure policies, monitor your web resources or register a domain with Route 53.
Domains
In this guide, I'll be showing you how to add a custom domain from GoDaddy to AWS Route 53. The reasoning for this is quite simple...I bought mine from GoDaddy instead of Route 53 and made the process a little more tedious than it had to be, so hopefully this can help ease your setup if you're in the same boat!
If you need to register a new domain or want to add your custom domain from another third-party DNS provider, see the links below.
- Amazon Route 53 FAQs
- Registering a new domain from Route 53
- Adding a custom domain from a third-party DNS Provider
Creating a Hosted Zone
Hosted zones are containers that hold records containing the necessary information needed to route traffic for a specific domain.
If you want to learn more about working with hosted zones and records, then check out the documentation below:
To create a hosted zone:
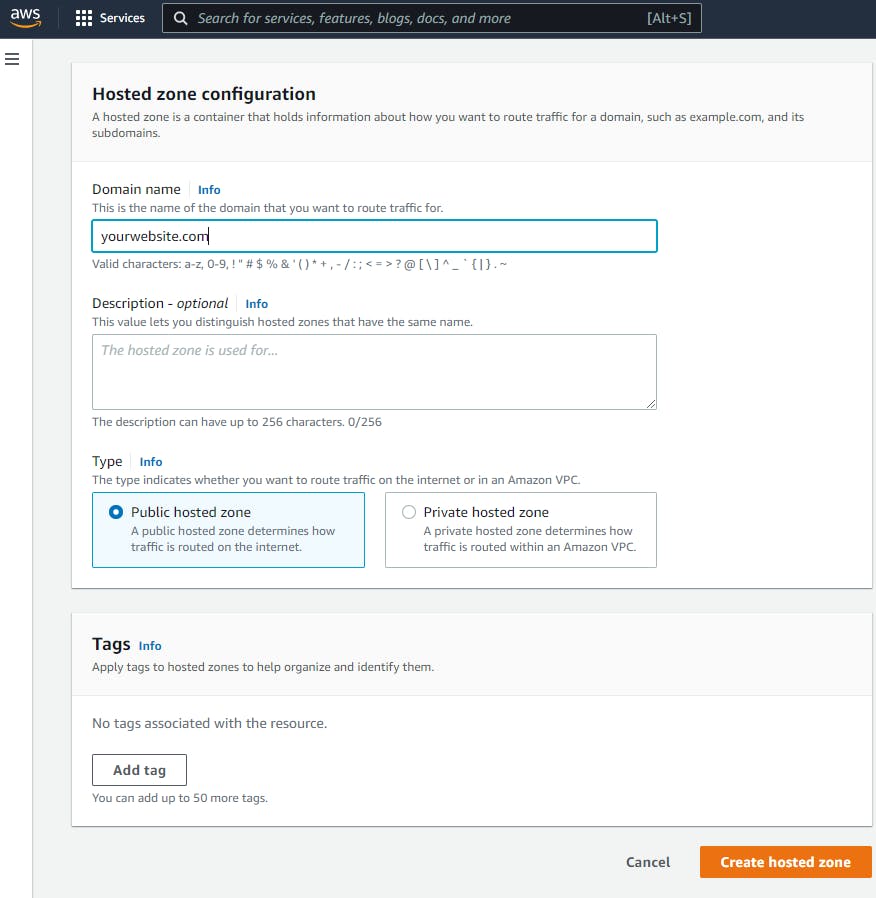
- On the Route 53 console, click on "Hosted zones" on the navigation pane.
- Click the "Create hosted zone" button.

- In "Domain name", type in the non-www version of your domain (The name of your bucket 2)
- Save the hosted zone by clicking "Create hosted zone" at the bottom of the screen.
Linking your GoDaddy Domain to a Route 53 Hosted Zone
Let's link the GoDaddy domain to the newly created Route 53 hosted zone. To do this, we are going to use the custom name severs that are provided by the hosted zone.
- Log into GoDaddy and go to your DNS settings for your domain.
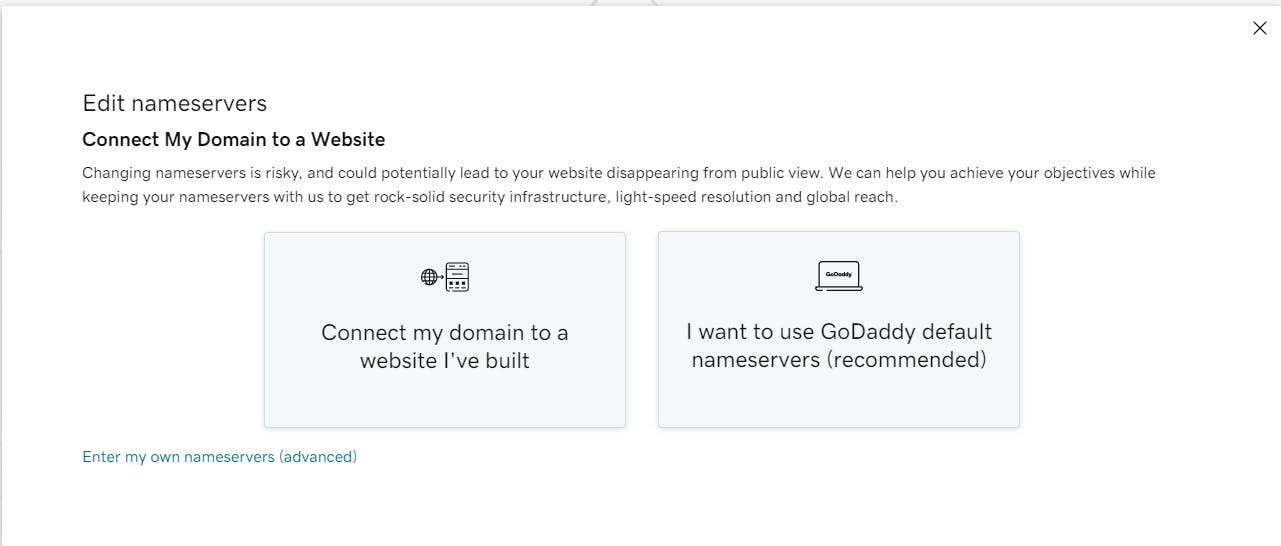
- Click on the button to add custom name servers in the Name servers section. A prompt will appear. click on the text below stating, "Enter my own name servers(advanced)".

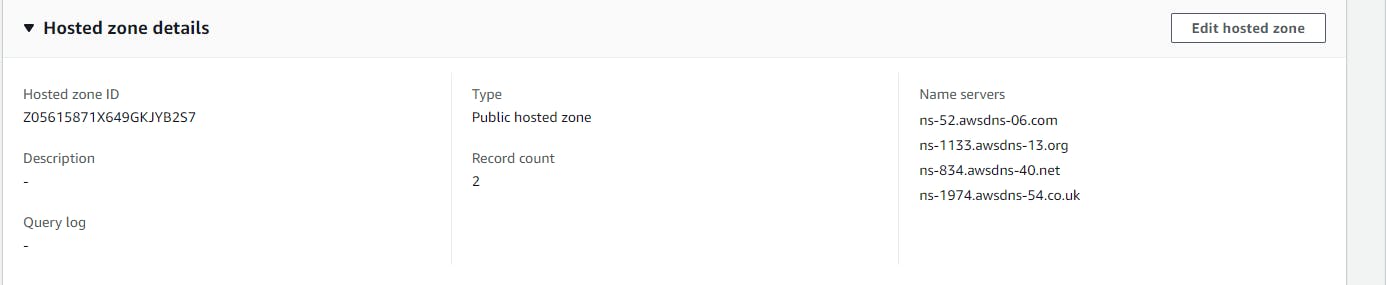
- On the Route 53 console, click on your hosted zone details and copy & paste all 4 name servers into your GoDaddy prompt.
- Click the save button.
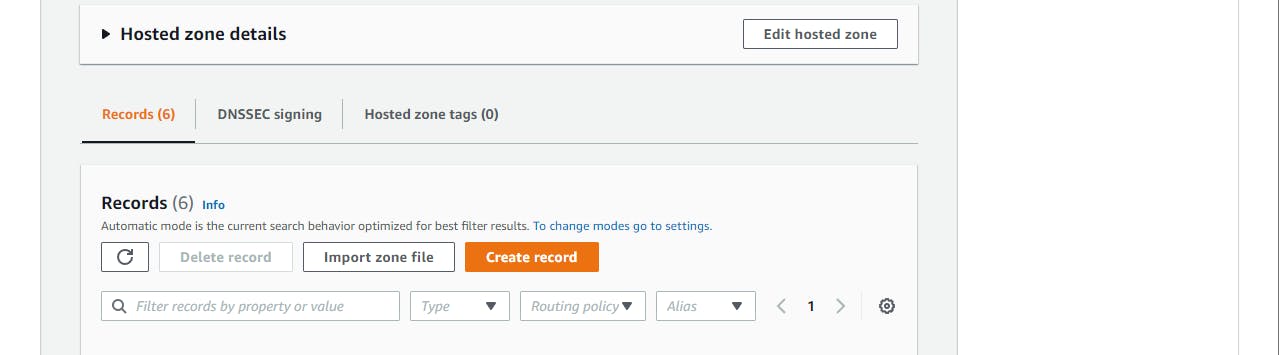
Creating Records
- Go to the "Hosted zones" page and click on your hosted zone.
- Click on the "Create record" button.
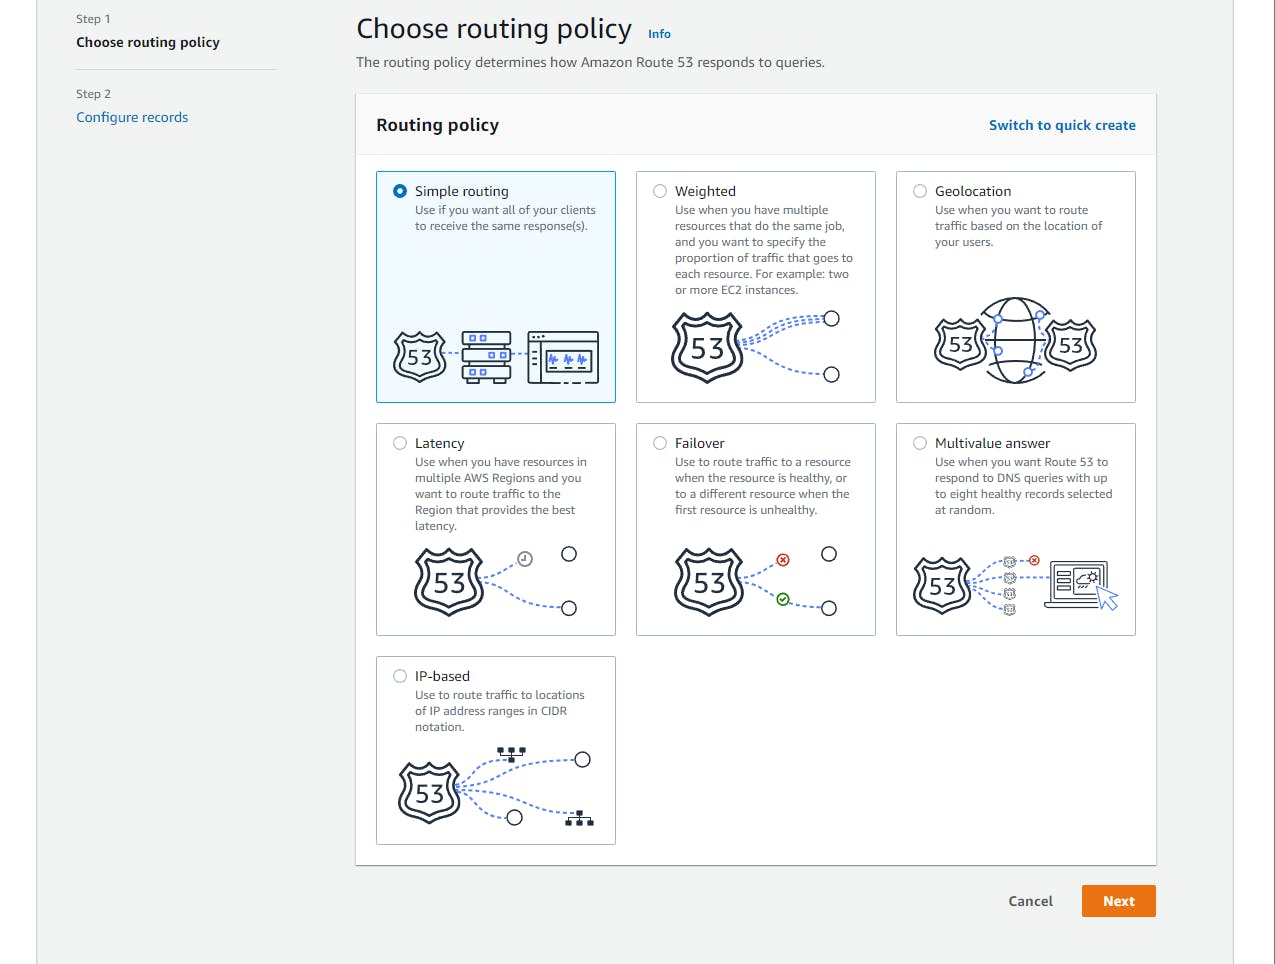
- Click on the "Simple routing" policy and then click the next button. This is a policy that resolves records to a single resource, which is just a fancy way of saying that the webserver will serve users your website content when going to your domain.
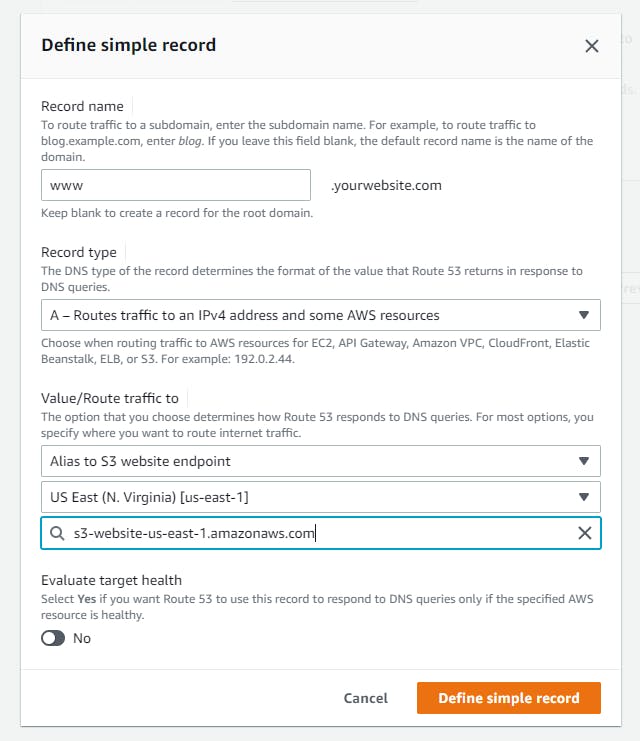
- Click on "define simple record".
- The first record created will be your www version of your domain. In "Record name", type "www" for your subdomain. It's important that your record names match your S3 bucket names.
- For record type, keep the default "Routes traffic to an IPv4 address and some AWS resources".
- Select "Alias to S3 website endpoint" in the dropdown menu.
- Select "US East (N. Virginia) [us-east-1] to match the bucket location.
- You should have one option for your S3 endpoint. Select it.
- Turn off "Evaluate target health" as this is not needed.
- Save the record.
- You'll be redirected to the "Configure records" page. Do NOT click the "Create records" button yet. Define one more simple record using the steps above, except this time do NOT add a subdomain.
Finishing Up
You should now have both of your S3 bucket endpoints connected to your hosted zone. Type in your domains in your search engine (try www and non-www versions) and they should work! If you want to stop here you are more than welcome to, however if you'd like that lovely HTTPS protocol please continue!
Later in the guide we will be revisiting Route 53 to edit our records for our CloudFront distributions to get your website served by CloudFront with the HTTPS protocol. Next up is to create our SSL certificate that we will implement in CloudFront.
Amazon Certificate Manager
The AWS Certificate Manager is a service that simply manages your SSL/TLS certificates. It allows you to request certificates and auto renews them for you! For more information see the documentation below:
Creating an SSL Certificate
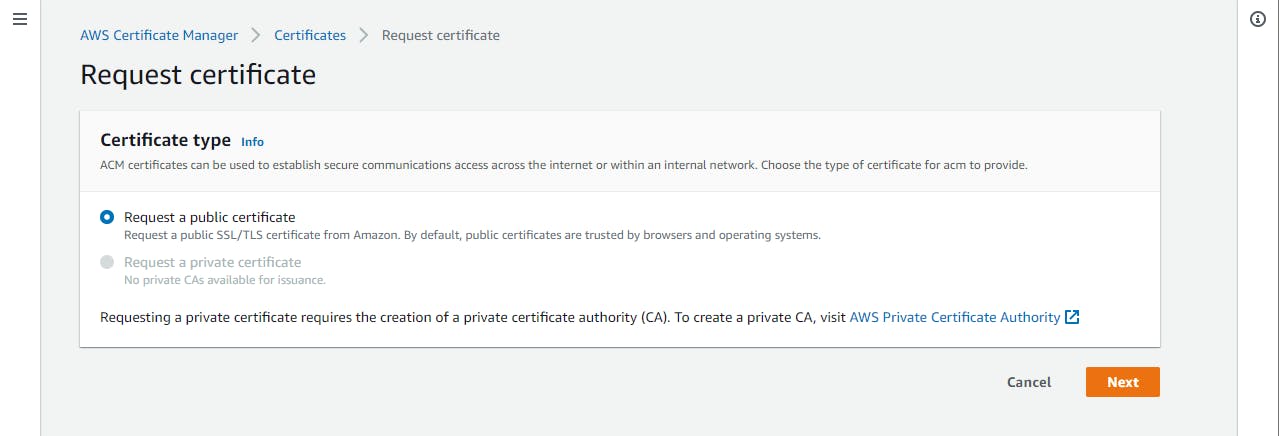
- On the AWS Certificate Manager console, click "Request certificate".

- Make sure "Request a public certificate" is selected.
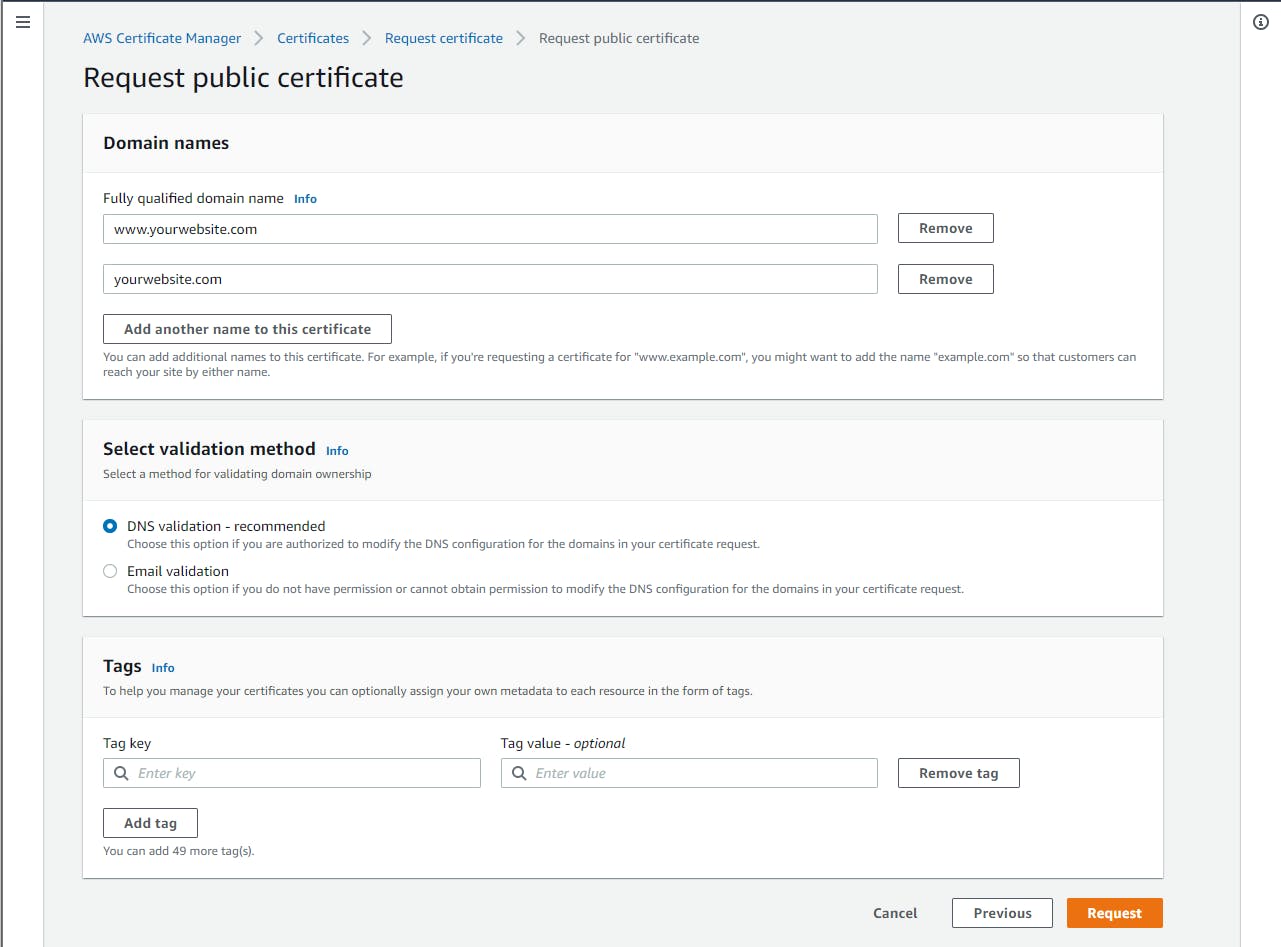
- Next, enter the fully qualified domain name, which is your www domain version.
- Click "Add another name to this certificate" and add the non-www domain version.
- Click "Request".
Create Records for the Certificate
- After creating your certificate, you should see a banner to view your request. Click on the banner to view the status of the request.
- Click "Create records in Route 53".
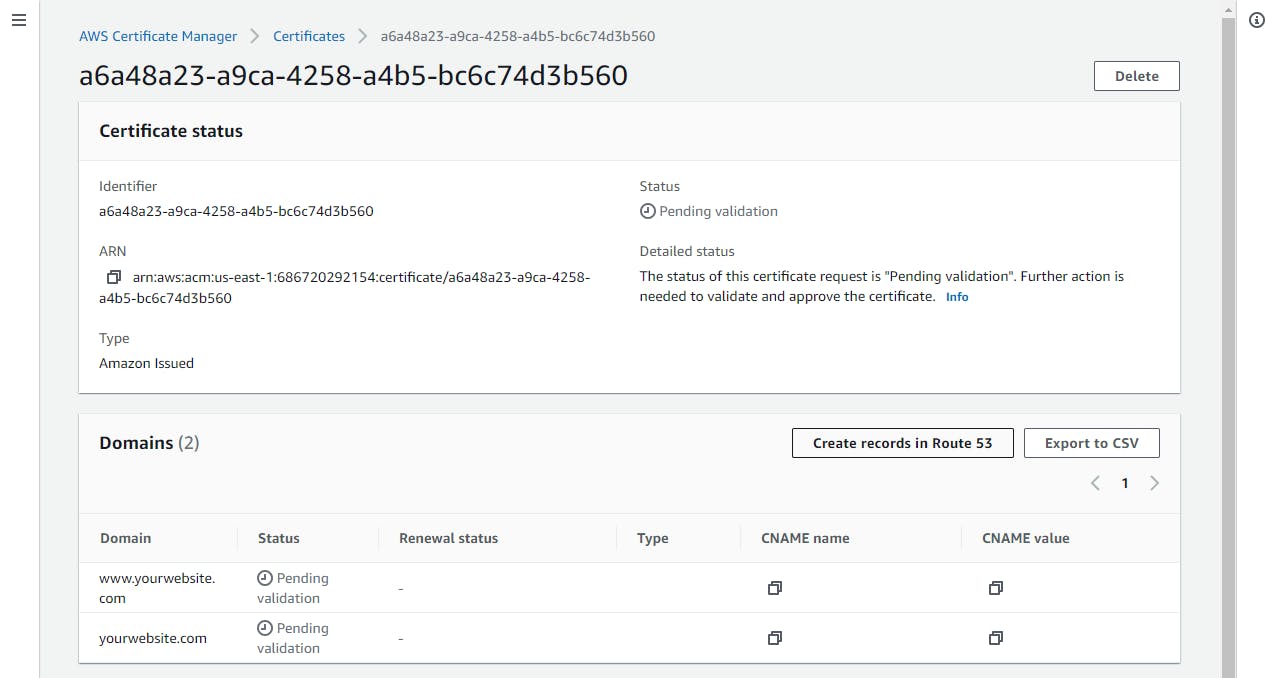
- Select the certificates and click "Create".
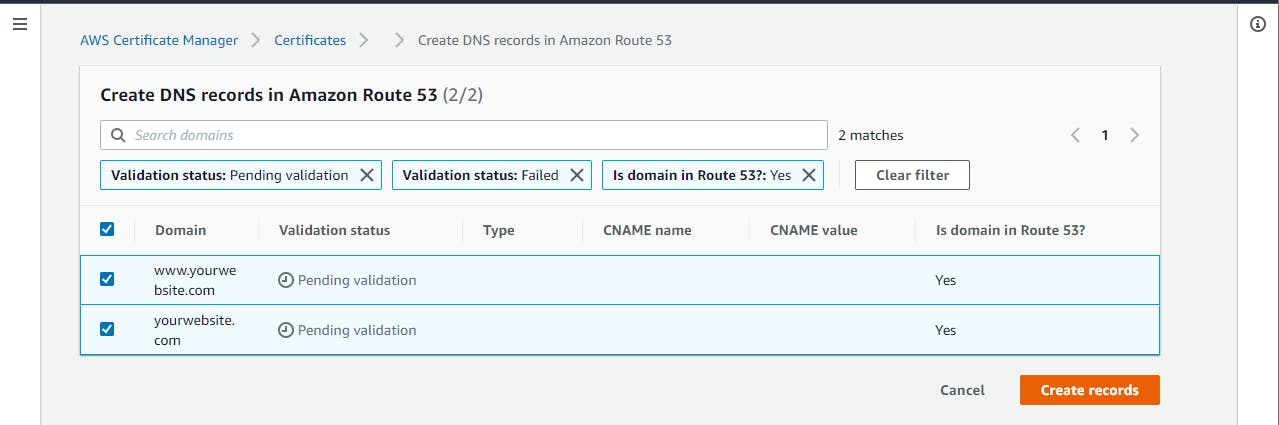
Finishing Up
Almost done! Once the certificate request has been completed, you should have a total of 6 records in your Route 53 hosted zone. Now, all we have to do is create the CloudFront distributions and add them into our hosted zone.
Amazon CloudFront
CloudFront is Amazon's global content delivery network (CDN). It's a network of servers called edge locations all around the world that actually cache your content (images, videos and of course static websites) and serve it to users who request it. With cached content, the delivery is lightning fast and when using CloudFront, static websites can utilize HTTPS.
Creating Distributions
Distributions tell CloudFront where your content will be delivered from. For the most part, we are sticking with the defaults, and we will go over everything that is needed.
We will be creating two distributions. One for the www domain and one for the non-www domain. Both will use the same instructions below.
To create distributions:
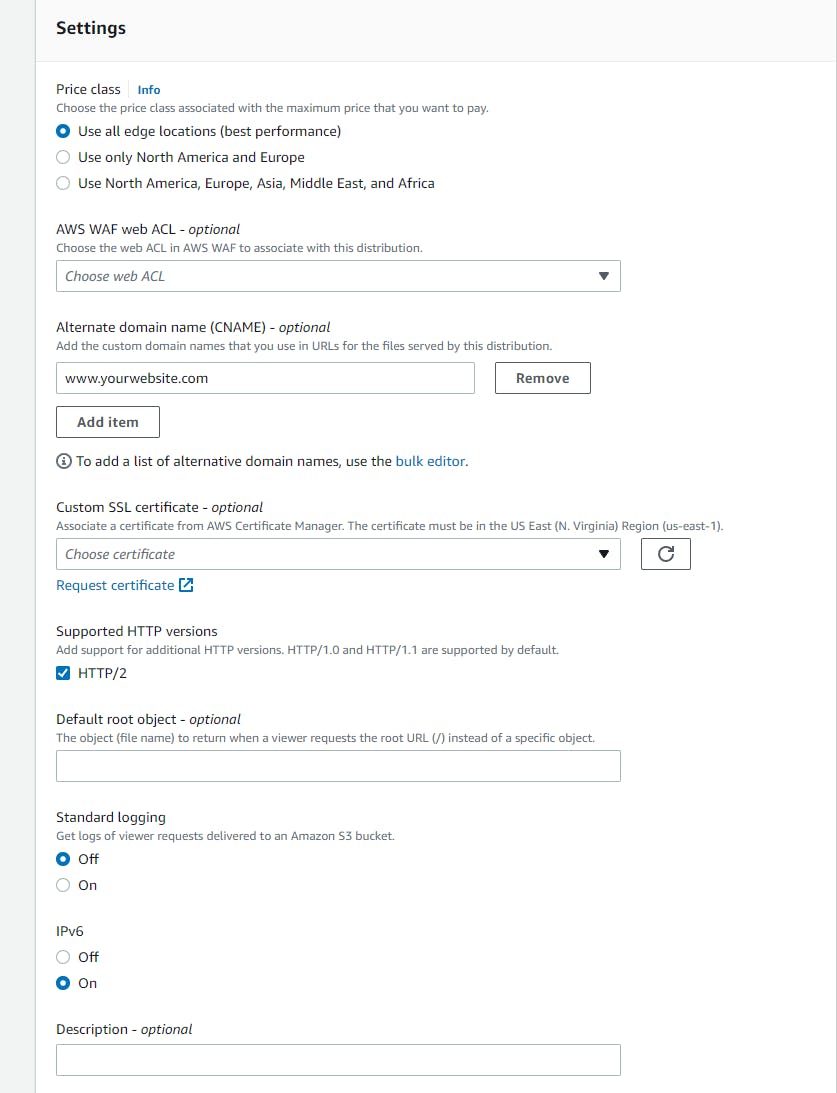
- On the CloudFront console, in the "Distributions" page, click on the "Create distribution" button.

- In the "Origin domain" field, Amazon's autofill may show you incorrect origin domains. To ensure that you add the correct one, we will get the domain from an S3 bucket. Open a new tab with the S3 console open and select the www domain bucket. Go to the "Properties" tab, scroll all the way down and copy the domain at the bottom of the "Static website hosting" section. Paste the domain into "Origin Domain".


- Select Redirect HTTP to HTTPS. Leave all other settings in the "Default cache settings" section to their defaults.
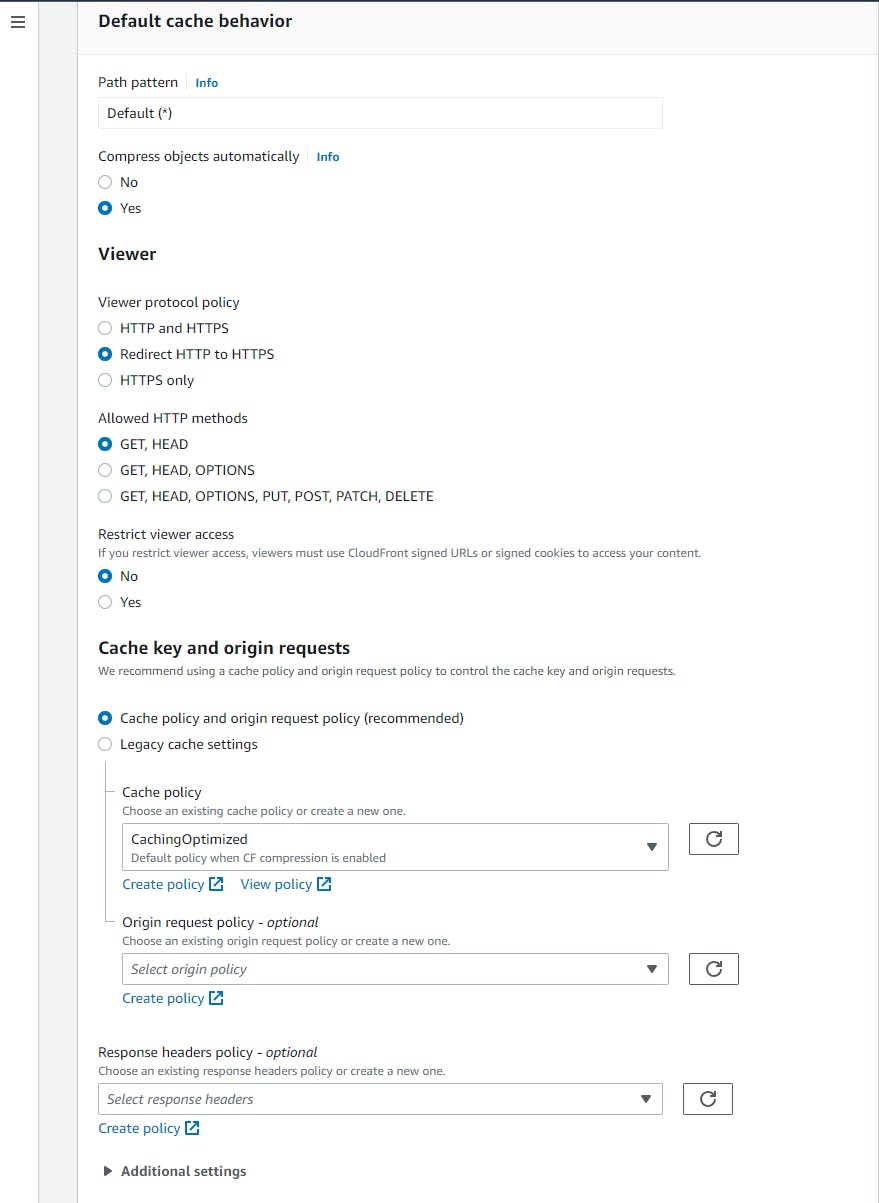
- Enter your www domain into "Alternate domain name (CNAME)".
- Select "Custom SSL Certificate" and it should autocomplete the certificate you created.
- Leave all other settings to the default and click "Create distribution".
- Repeat these steps, but for the non-www domain.
- Check the Distributions home page and ensure that the state is "Enabled". This may take a few minutes.
Adding the Distributions to Route 53
Now that you have both of your CloudFront distributions up and running, we need to replace the "A" records, so they point to your distributions.
- In Route 53, click the checkbox next to the record that is type "A" and is your www version. Then click "Edit record".

- Change the "Route traffic to" selection to "Alias to CloudFront distribution".
- For the "Choose distribution" field, there should be one auto filled option available. Click that and save the record.
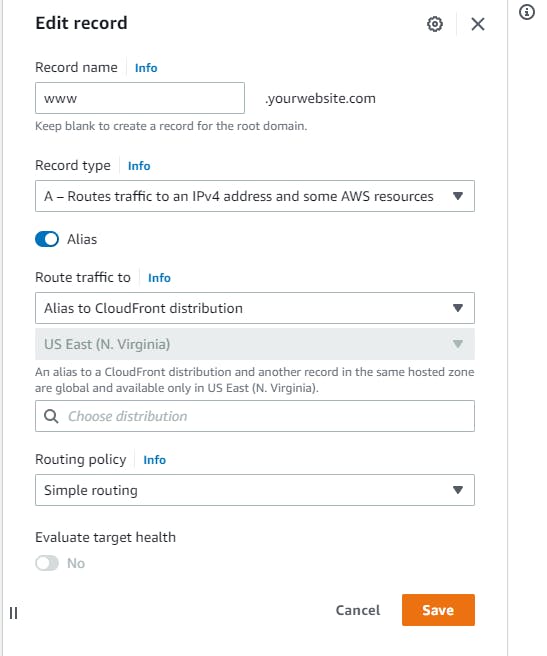
- Repeat these steps for the type "A" non-www record.
Finishing Up
Thats a wrap! Go ahead and type your domains into your search engine. You should see that you have "https://" in front of your domain, and if you typed in your non-www domain, it should redirect you to the www version.
Conclusion
I know that was long but be proud that you now have your very own website on AWS that is super-fast, reliable and safe. I'd like to mention that there are plenty of other hosting options that are a lot simpler than AWS like: HostStinger, BlueHost, and HostGater and choosing your provider should be based on your own needs.
I hope you enjoyed the guide, which happens to be my first blog post! Let me know if you're interested in a guide on how to set-up a CI/CD pipeline using GitHub Actions and AWS to update your website whenever you make changes automatically and I'll whip that up. Thanks again and congrats on your website!